

In most cases, teams that migrate to Streamtime make the move from another tool, or a suite of tools, that they’ve been using for a while. This means that they already have lots of important data in another place.
The problem here is not to do with losing this data, but instead to do with transferring important information about these jobs from the previous tool to Streamtime. The notion of re-entering months worth of timesheets probably sends shivers down the spines of most — so it should. But, for some reason it’s assumed by many that tasks such as these are inherent to the migration process. Why though?
This data is already recorded somewhere — either in your old tool, which some will keep access to for reference’s sake, or in an exported CSV. You’ll be able to query these if for whatever reason you need to hone in on specific detail about a job.
So, when it comes to transferring active jobs that your team is currently working on into Streamtime, re-adding hundreds of time entries and expenses should not be considered a necessary task.
But, this isn’t to say that it’s not important to account for this information against the job in Streamtime — it certainly is. The time tracked against the job is a cost to your business, that needs to be sold to the client. There are probably some additional costs too — third-party expenses or disbursements that are associated with the project. These costs can easily be accounted for in Streamtime in bulk by using a single expense, saving you time.
Let’s take a look at the few things you need to do to have a job appear ‘up to speed’ in Streamtime.
Transferring a Job to Streamtime
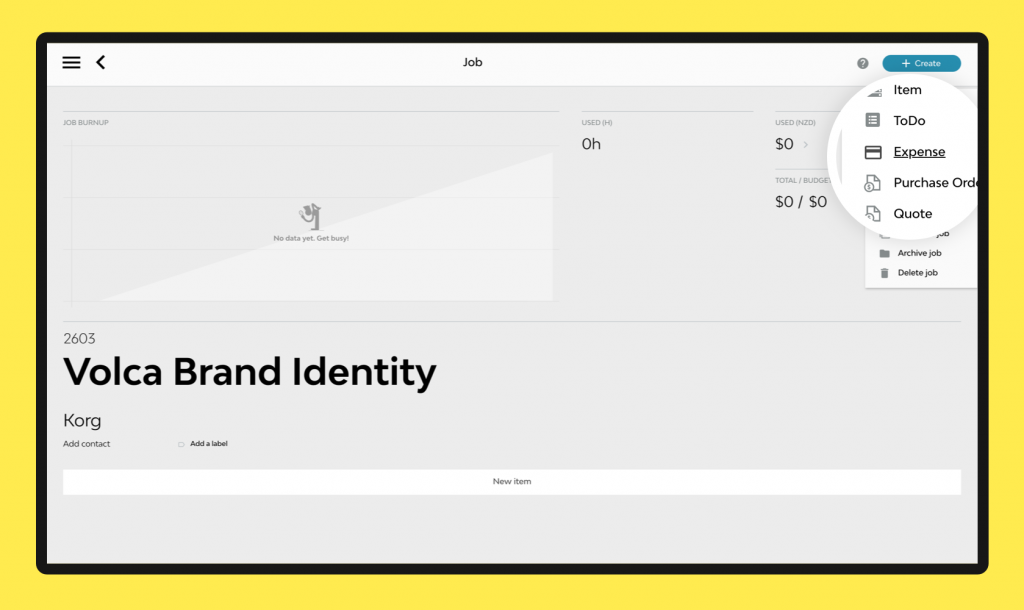
So, you’ve created a new job in Streamtime, with the name and client of the job as it already exists in your previous tool. Firstly, add an expense to this job, giving it a generic name such as ‘Recorded Costs’ or similar.
This expense will account for the current total cost of the project (time + expenses), along with the project’s current total sellable amount, as it exists in your previous tool. This means that all time entries and third-party costs recorded so far are being accounted for with this single expense.
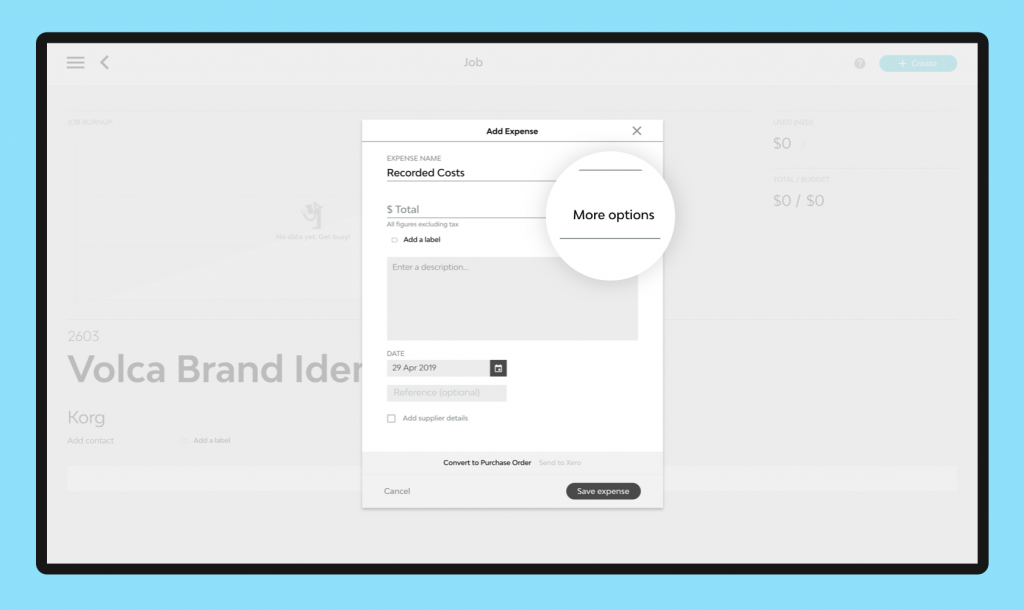
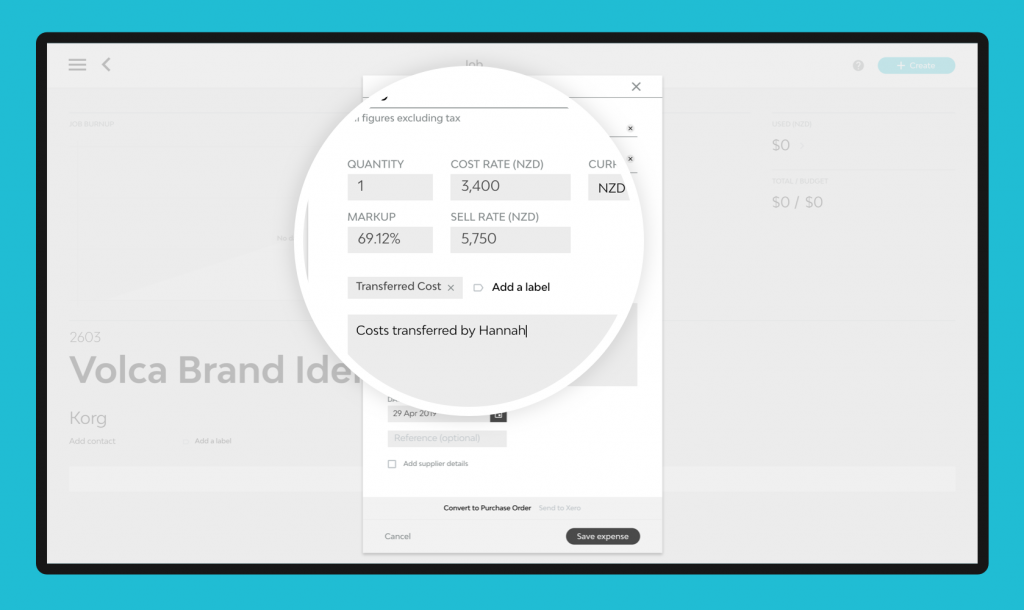
Opening up ‘more options‘ on the expense will allow you to add this cost and sell amount, and you may wish to also add a label for reporting purposes, or a description to clarify that details pertaining to these expenses can be found elsewhere. Save.
Now, there are a few other data points that you’ll want to add to this job to ensure it contains everything you need. These are the budget (the approved quote amount), and the total invoiced amount.
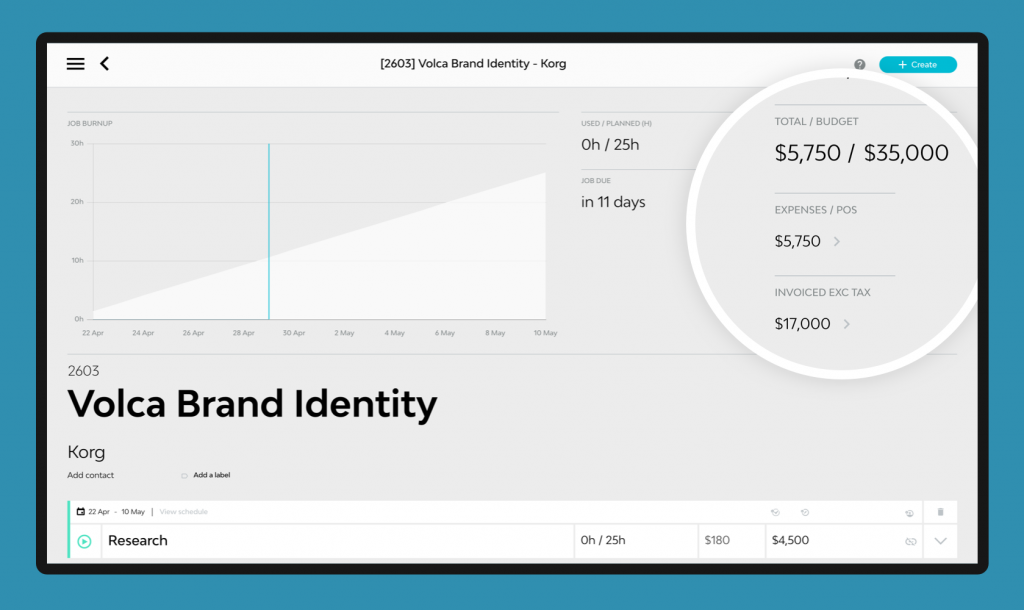
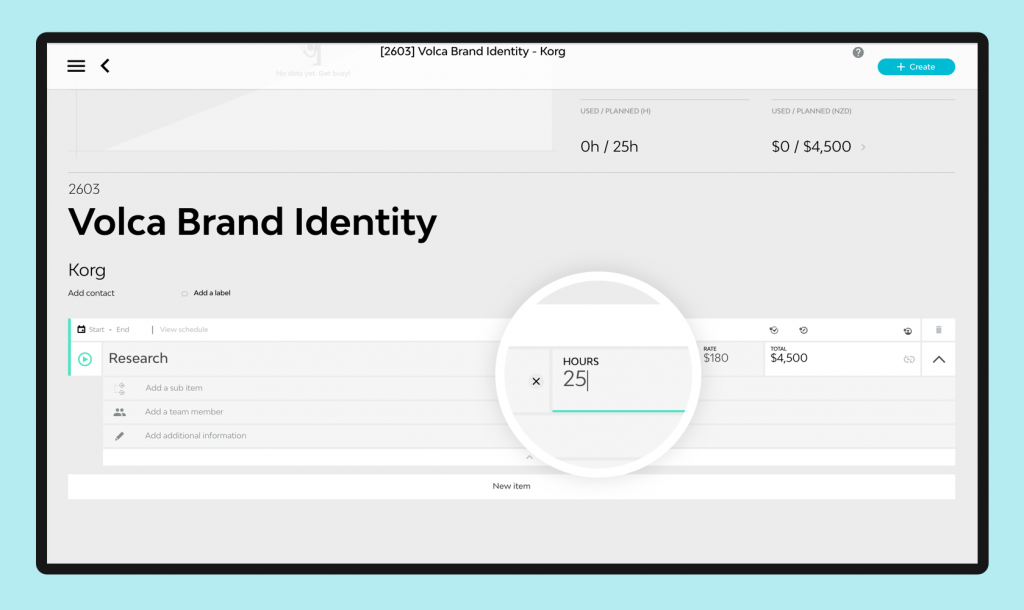
The last thing you’ll need to add to this job so that it’s ready for your team to get working on, is the remaining work to be done.
Setup items on the job with only the remaining hours to be worked, because any hours already tracked have already been accounted for. For example, if you quoted 40 hours of ‘Research’ and have already spent 15 hours on this, you should only add the remaining 25 hours into Streamtime.
To recap, you’ll want to make sure that you’ve got:
- An expense, with the current total cost and sell amount of the active project
- A budget, with the approved quote amount
- An invoice, with the total amount already invoiced for the job
- Items, with only the remaining hours planned
So, by being realistic about what you really need to see in Streamtime, you’re able to have your team start work on this job with minimal setup, and without wasting time on excessive data-entry.
More hacks?
Got any tips for your own hacks? Then please share them in the comments below and maybe we’ll feature them in an upcoming post.
Interested in other Hacktime tips and tricks? Head here to read other posts from the series.